How to design a utility
Creating the perfect utility space.
With our hectic pace of life, a highly functional utility is a must in every home. Like your kitchen and bathroom, this is a hardworking space.
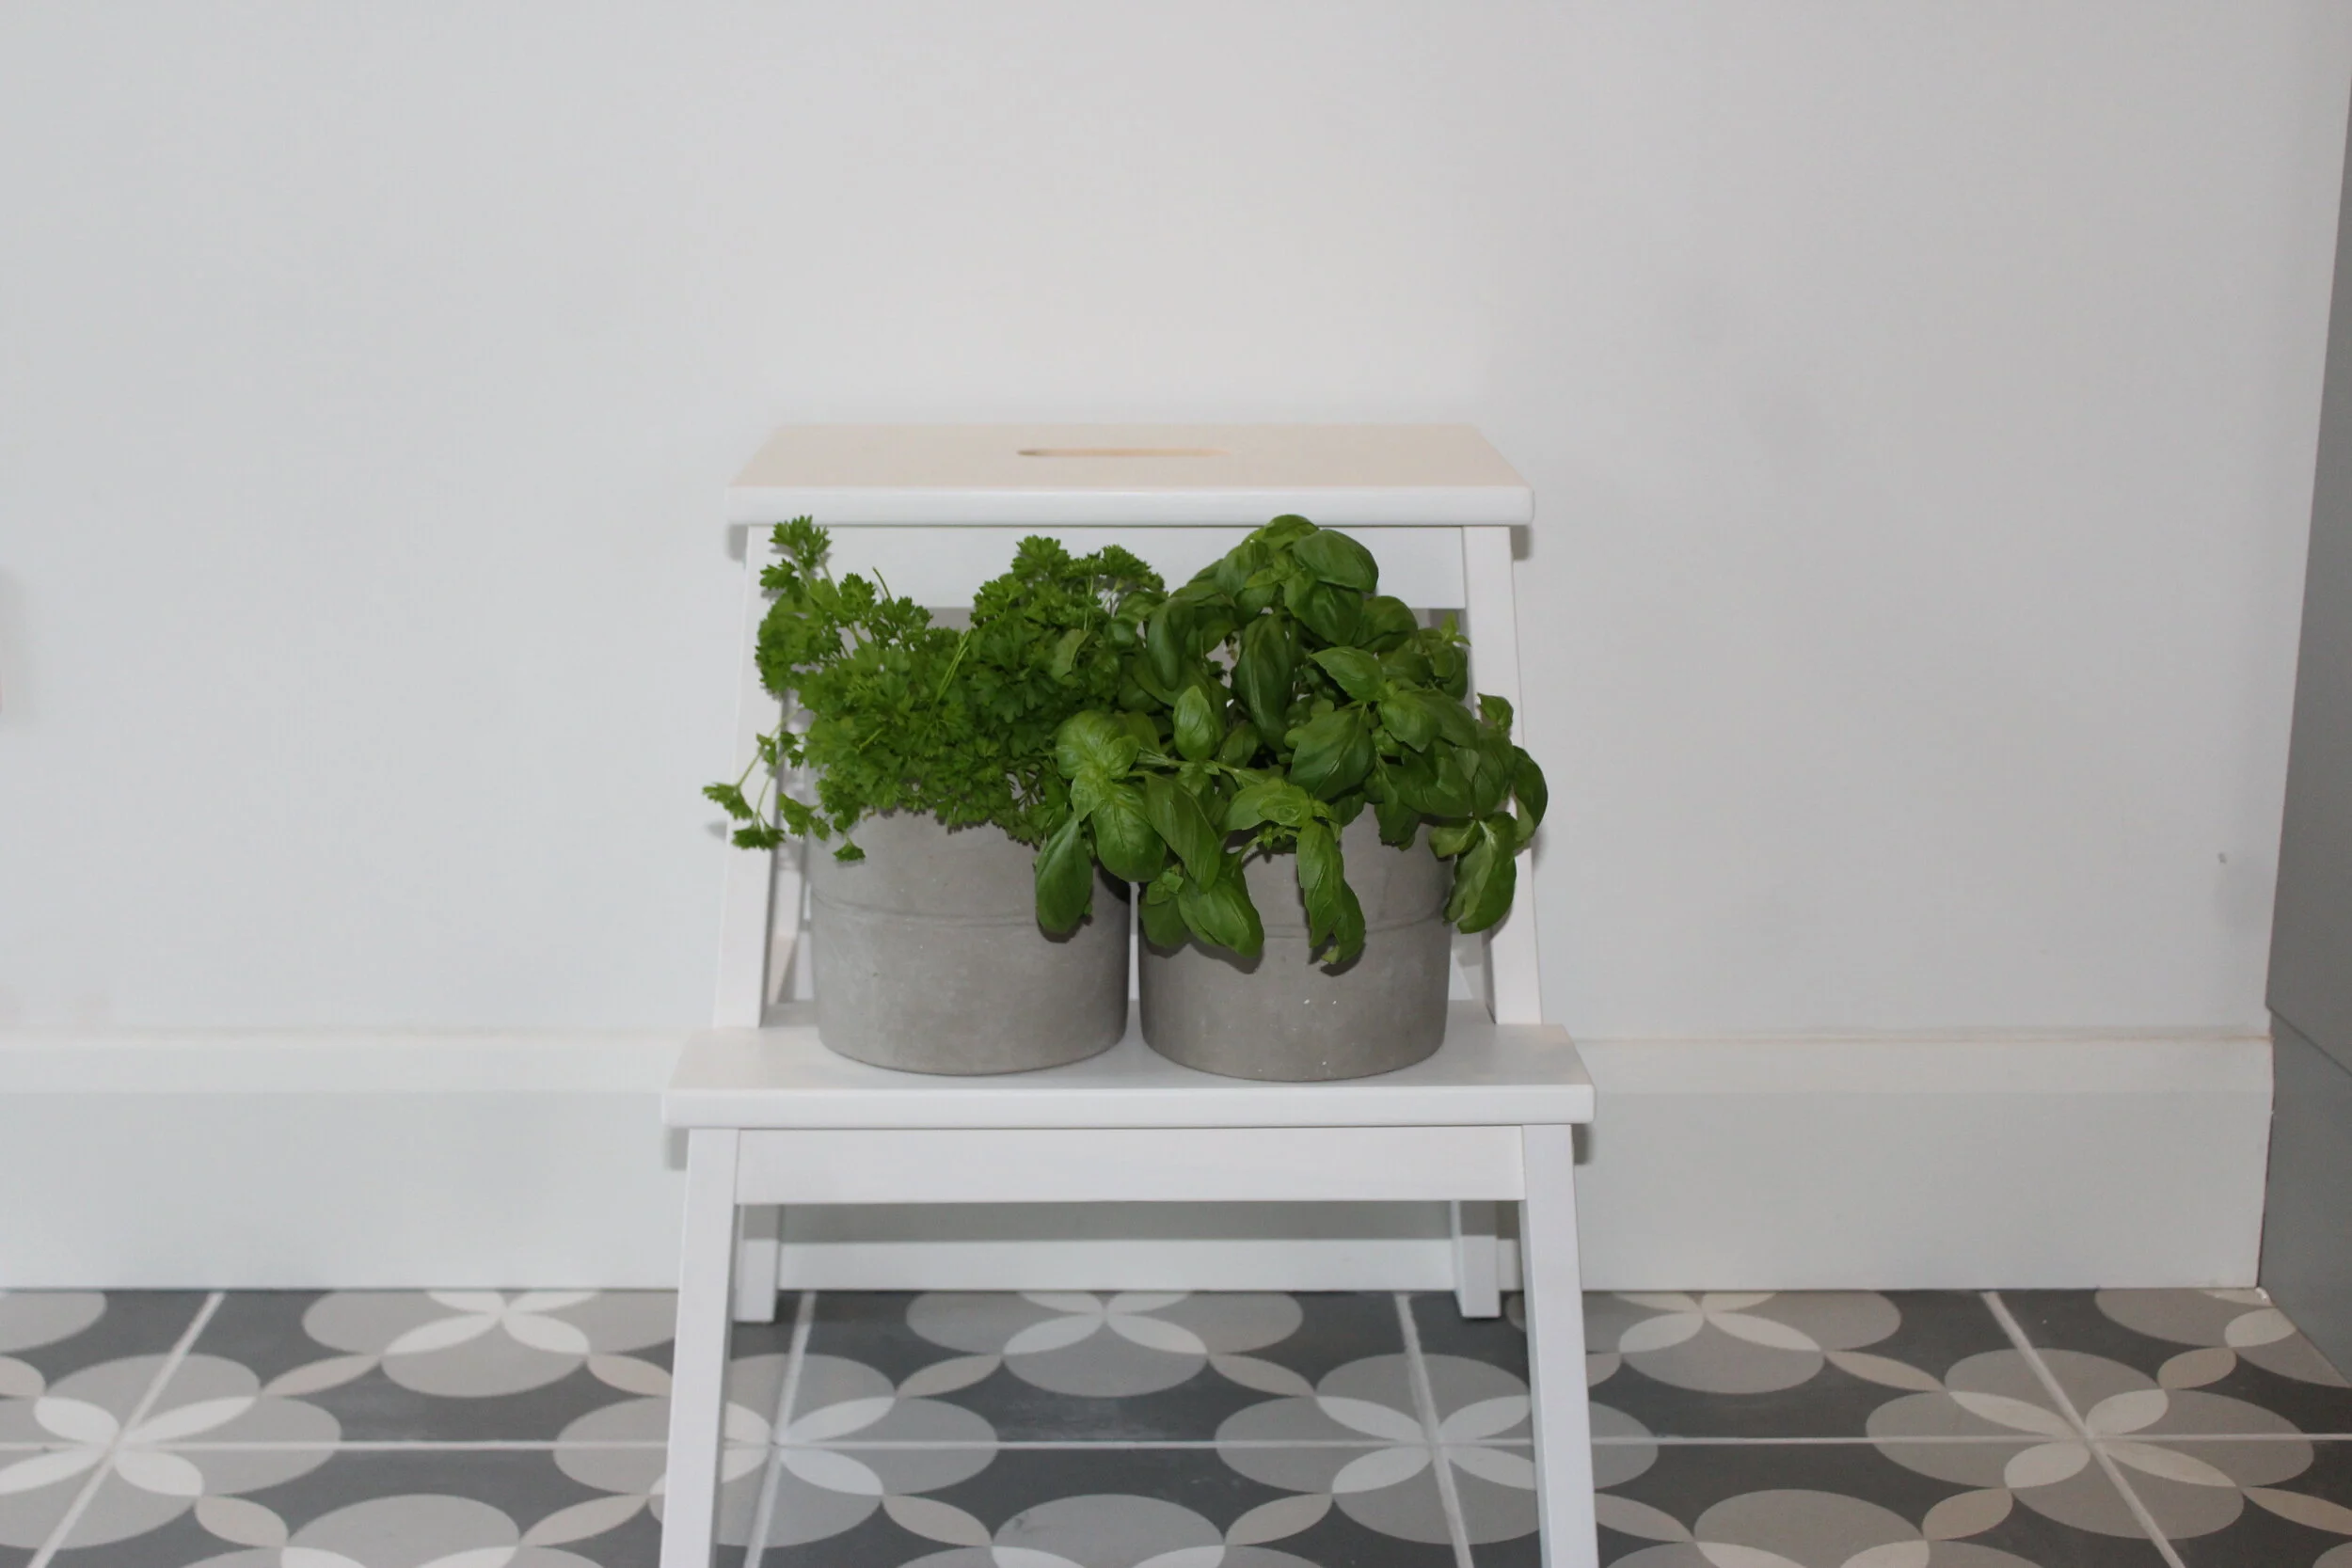
Utility room with step ladder and potted herbs.
For homes that have a specific designated area for their utility, it is always worthwhile investigating if you can improve this space. Does your existing utility cater for all your specific needs? Have you space for everything you wish to store? Could it work better in a different part of your home? Could you alter the layout to better suit your requirements?
Planning and executing our utility for our new build was no mean feat. Hopefully by sharing our journey, you can benefit from some of our tips and advice on how to design a utility that works for you.

Utility room with laundry bag and storage units.
Not all homes are gifted with a dedicated utility space, so how do you go about creating the perfect one for you and your family?
Over the years, I have experienced the hardship of living in a home with no dedicated utility, another with a very small (but badly laid out) utility space and then in later years a utility larger than the average size of most kitchens. In addition to this, I have had the benefit of working on numerous utility designs throughout the years with Placelift.
When it came to designing our new utility, these experiences proved invaluable. You would think that being blessed with a blank canvas of a self-build that we would have opted for a large utility with a sink, a full height pantry and a jaw dropping Pinterest style boot-room to foot – BUT WE DIDN’T!
Working off our plans, we knew that if we opted for a large utility footprint, that it would impact on the size of the adjoining rooms. After spending some time thinking about how we would use our utility space, we were convinced that we could achieve a highly functional utility in a small compact space.
Since moving in, we have put our utility to the ultimate test and proved that you don’t require a large space (or even a room to create a great utility space). So, what’s the secret?
Planning - What’s going to happen in your utility?
Opting for a smallish utility that would cope with our specific needs, was a decision that we did not make lightly. Like most families, we have piles of daily laundry along with all that comes with caring for our two dogs and cat. Planning is key to getting exactly what you want (or close to it).
Taking time to really think about how we manage our laundry, what we hoped to store in this space and of course how we wanted it to look - were the key determining factors!
What did we need to consider?
We listed out every possible product/item that we hoped to store in our utility space (in hidden storage). We then thought about providing a home for all this stuff! You need to factor in what you need in terms of helping the home run like a well-oiled machine, your lifestyle in terms of hobbies and work (so football boots, pet food, work boots) etc.
We wanted to incorporate a high capacity washing machine and tumble dryer along with ample space to store our laundry - OUT OF SIGHT OF COURSE.
We thought about how we wanted it to look and how it would seamlessly flow from our kitchen in terms of style and functionality and lead to out to our side garden.
As we went with full height units, we were able to place double doors above the dryer for storage. Here we store clothes pegs, drying hangers, and all that is required for our large house plant family.
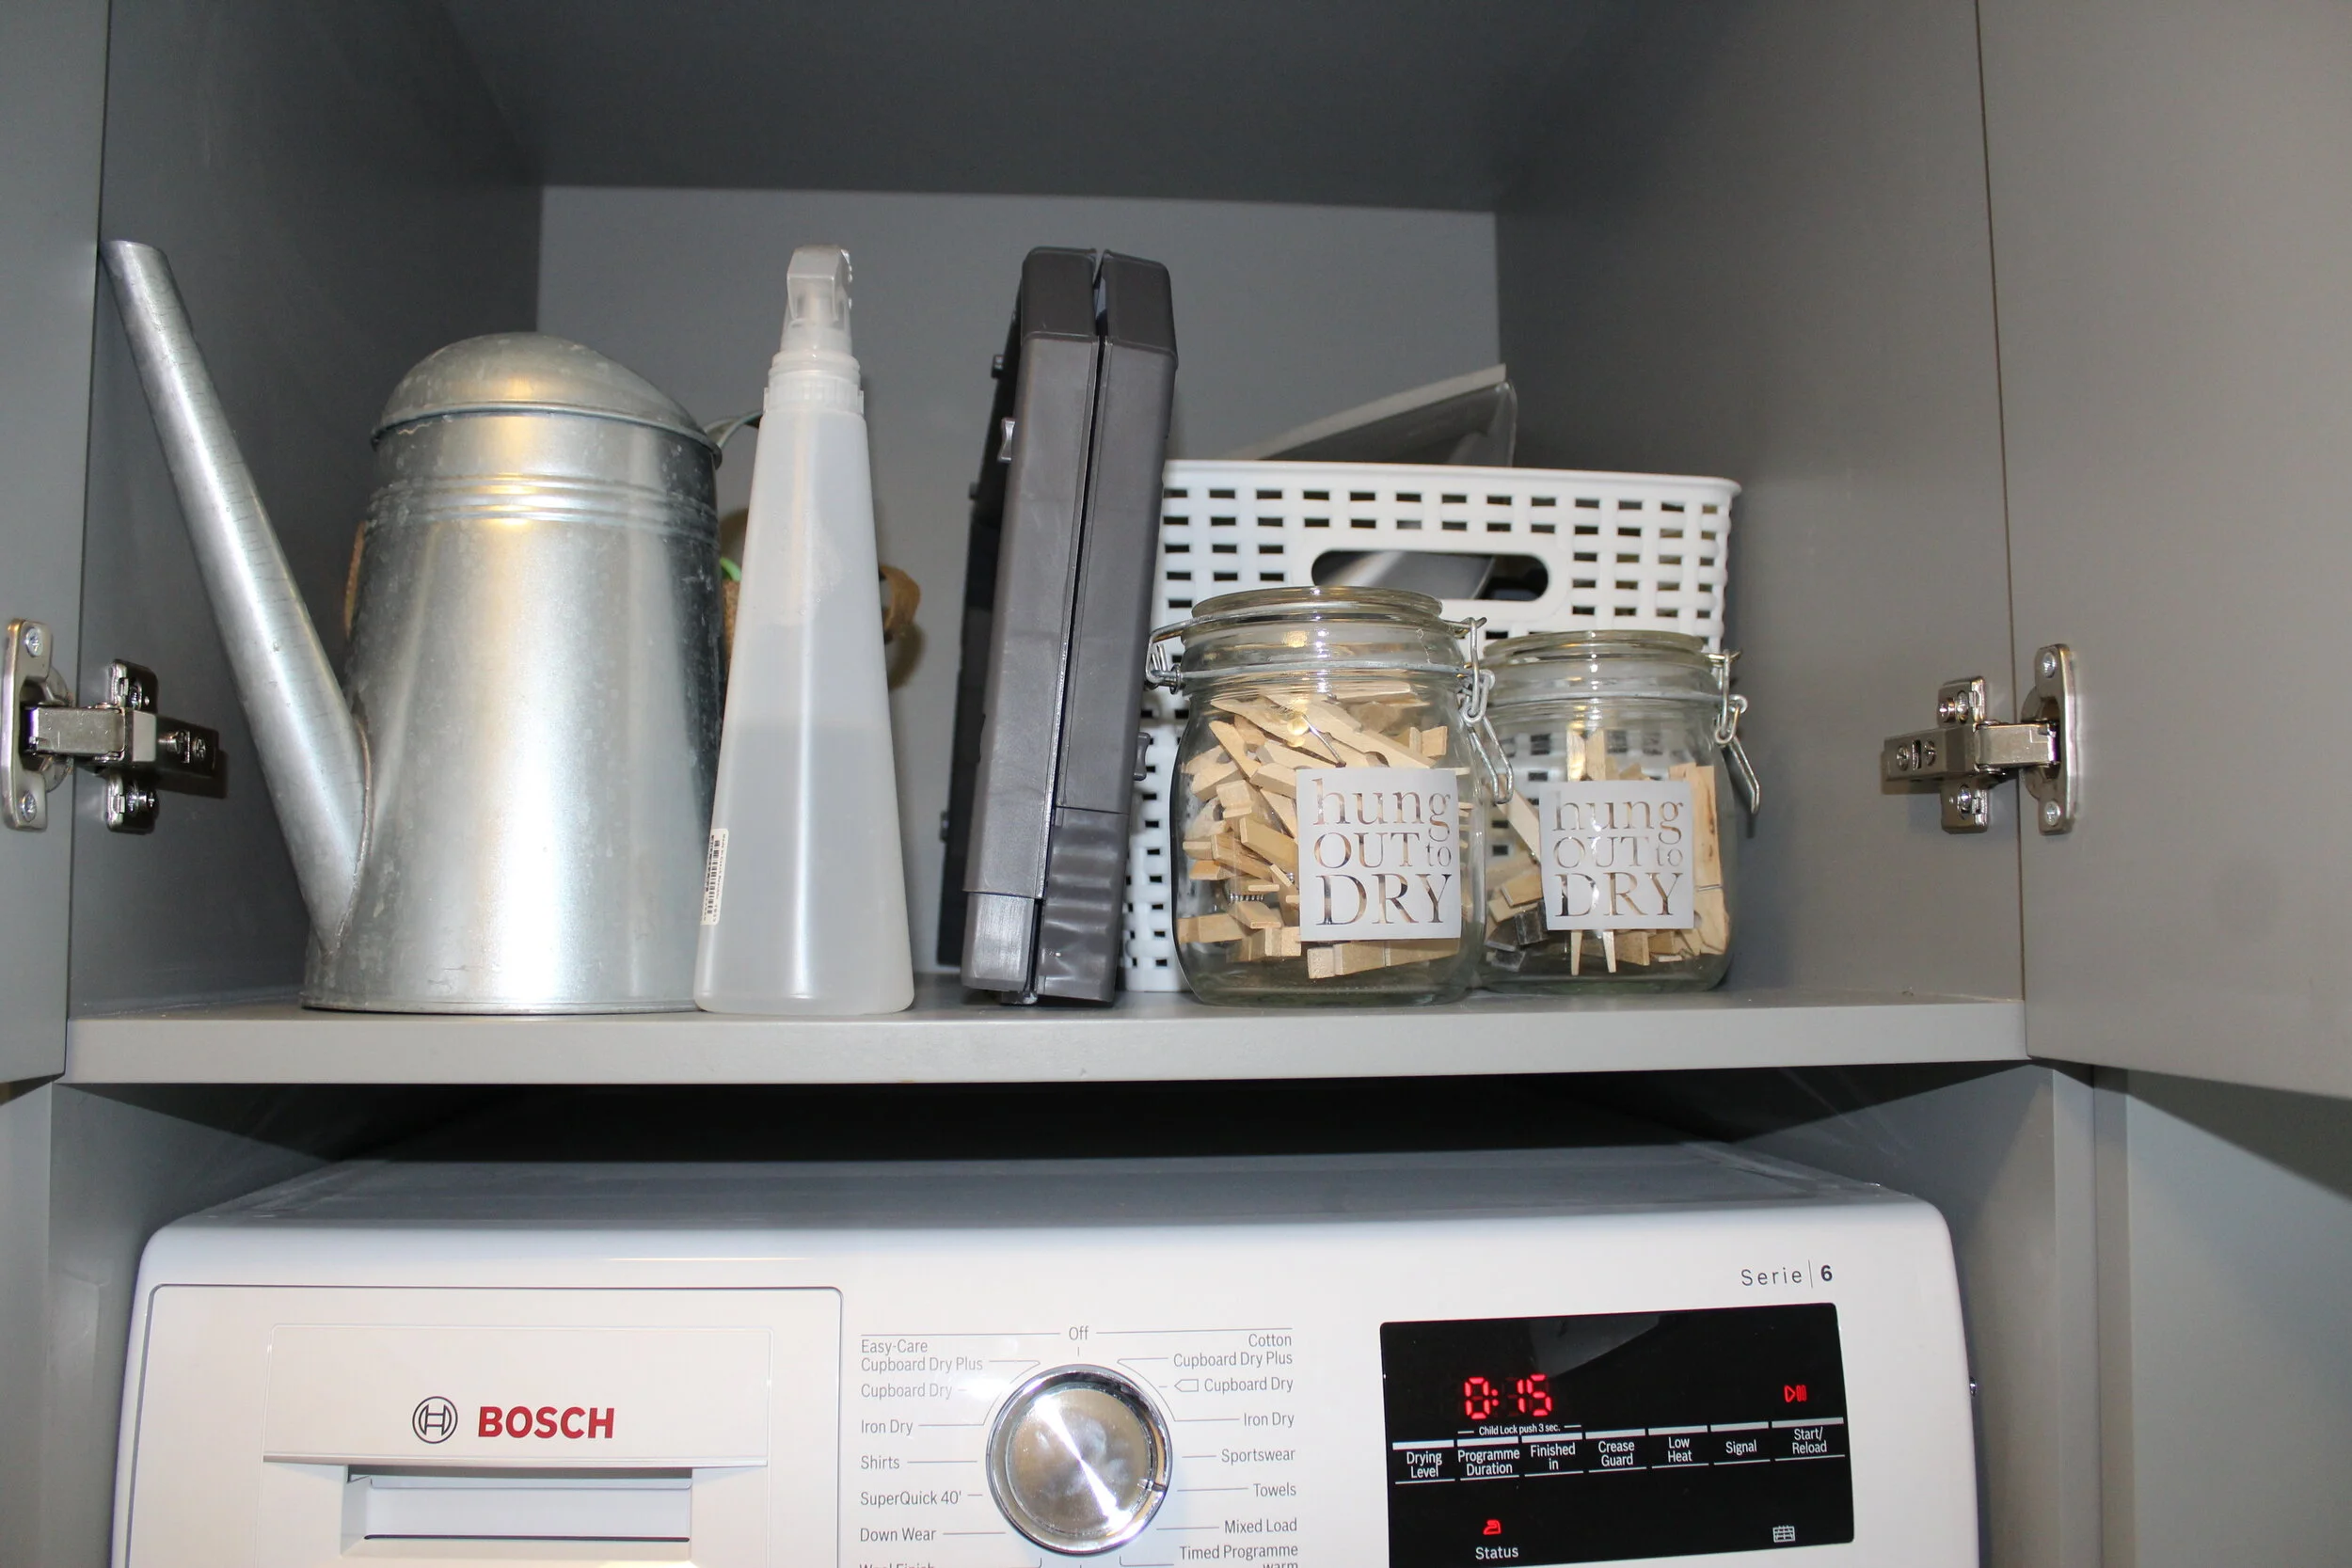
Storage unit above stacked washing machine and tumbel dryer.
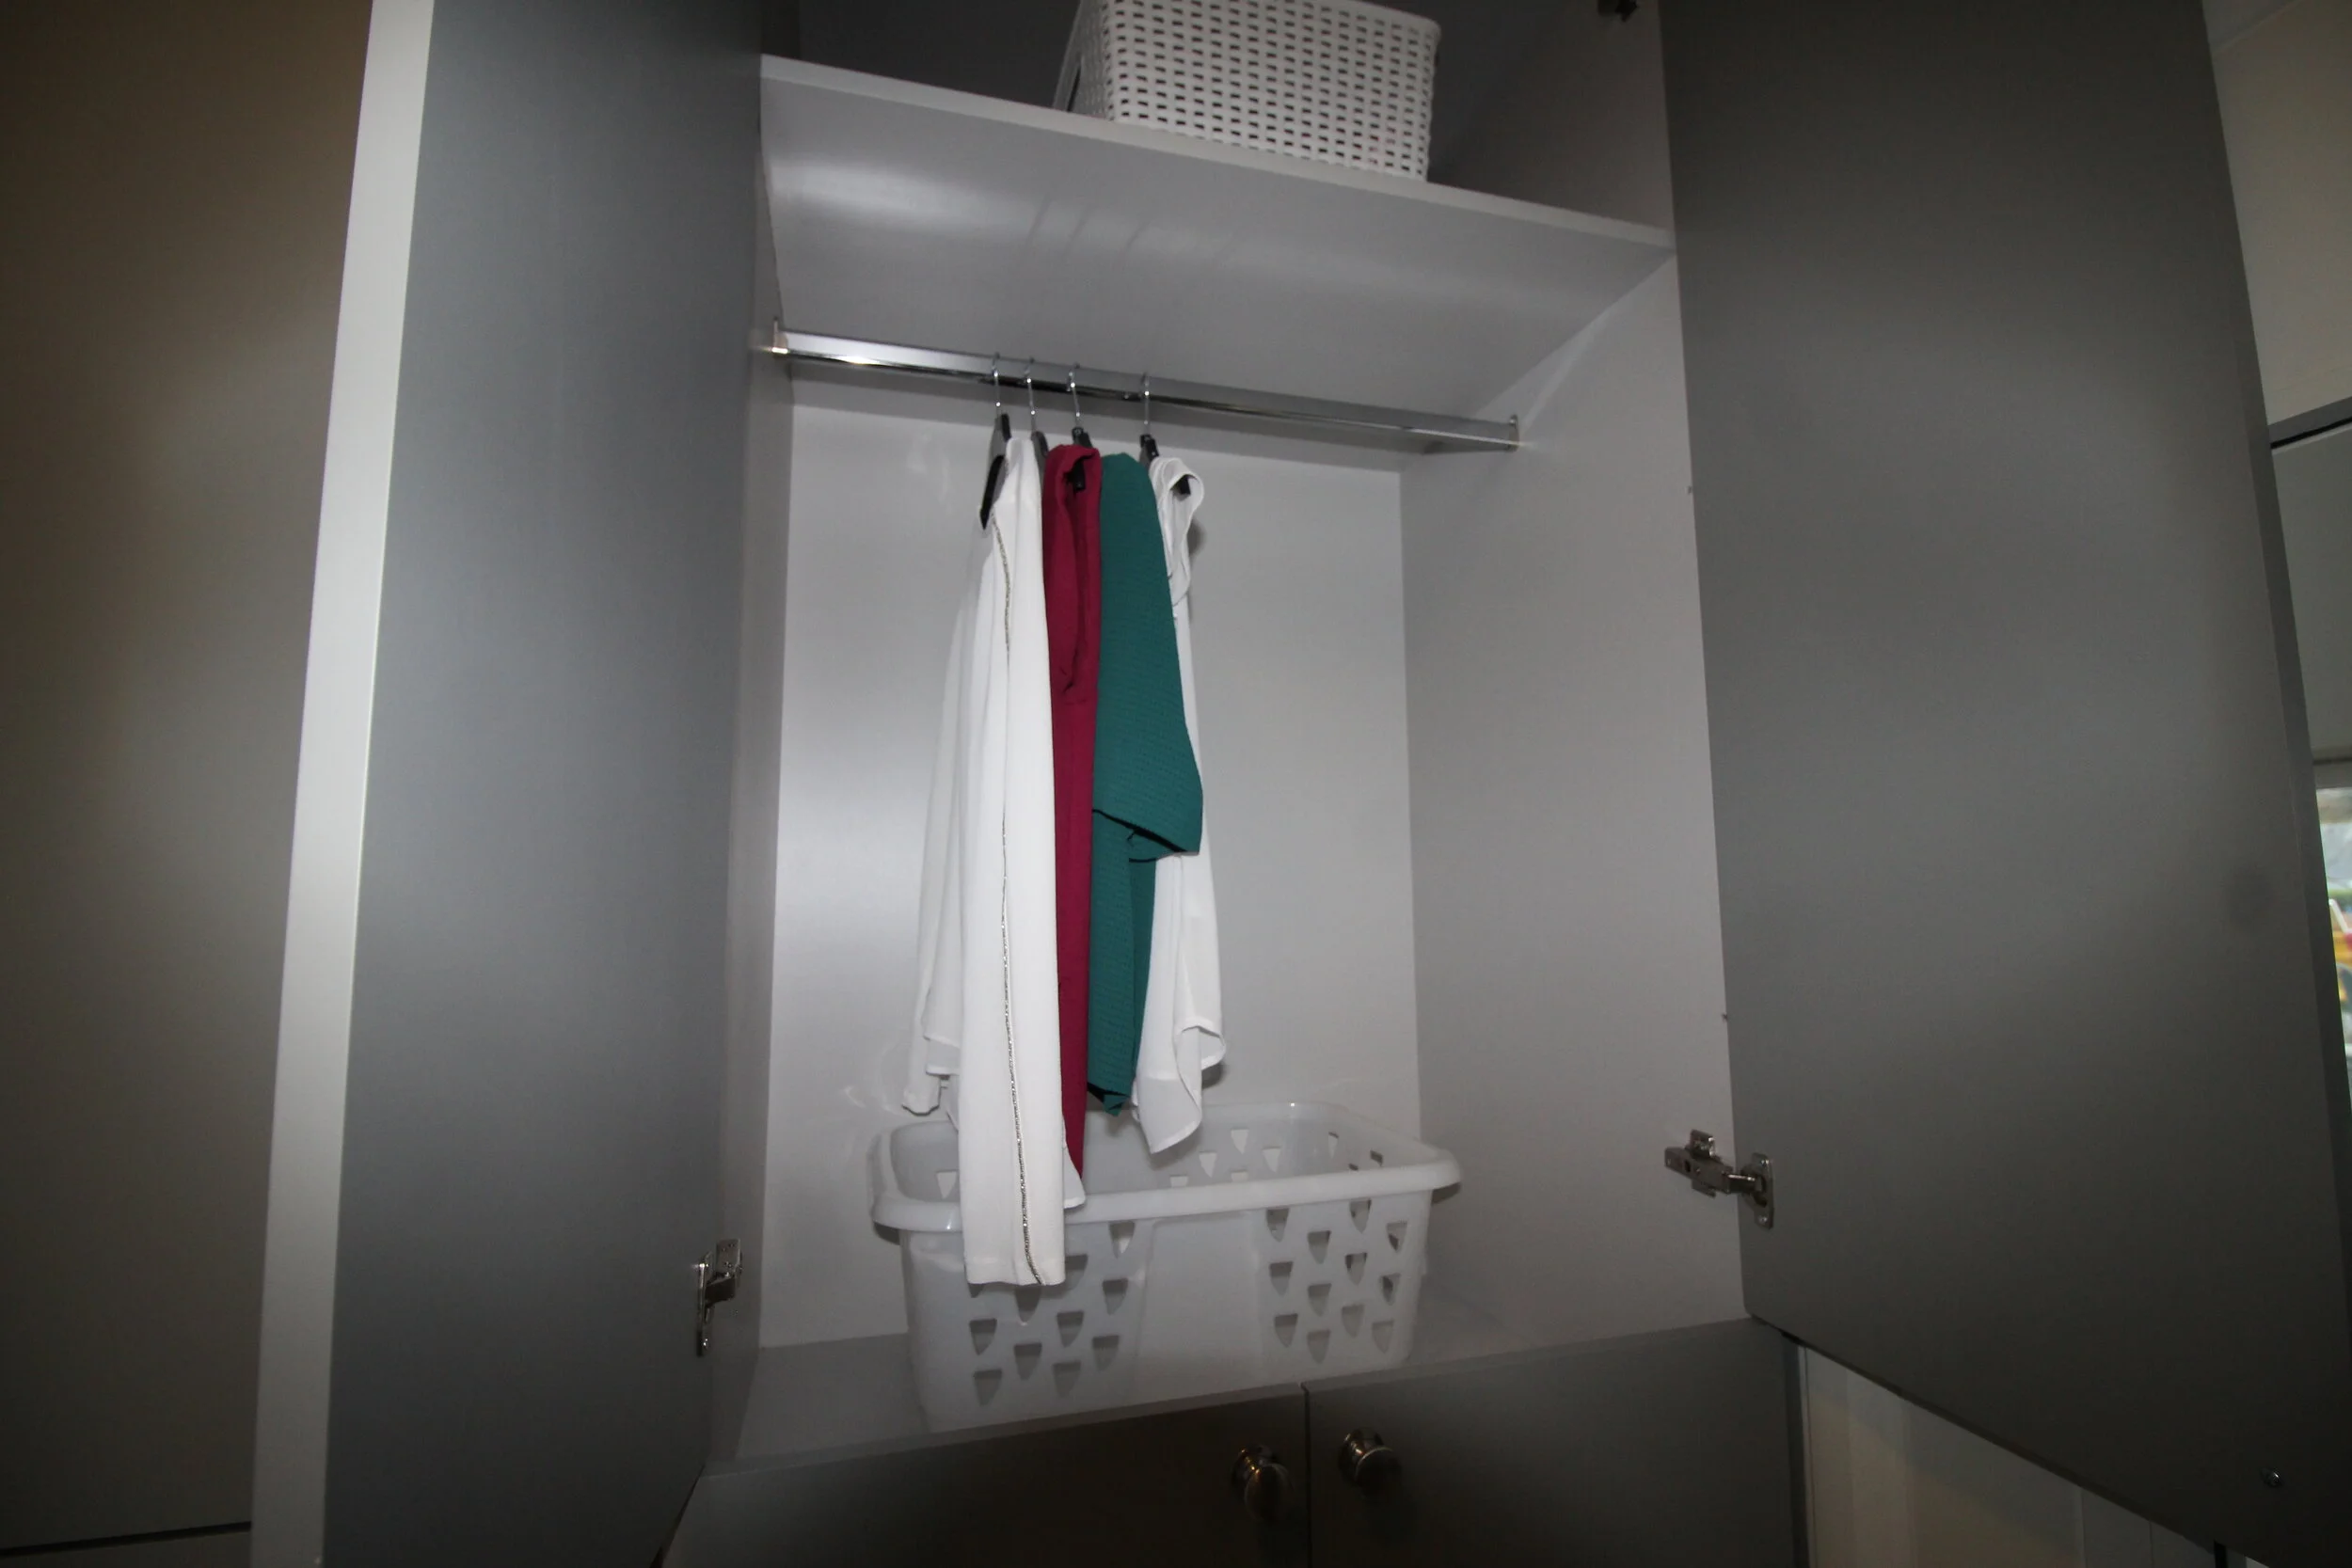
With the sheer volume of weekly laundry, our main objective was to avoid seeing this piling up. I took some time to see how I liked to take care of our laundry. The actual process I like to use (please tell me I am not the only person with a process). Funny enough, I realised that I do have a pretty good system but unfortunately, it never looked like it in the past as the laundry baskets were always piled high along the floor of our previous utility spaces.
So back to the system, which is very basic. I like to separate the laundry as follows: white, lights, towels, wools and darks. From this, I decided to place a full height wall to ceiling unit with a closed door alongside our stacked drying and washing machine. Within this unit, we placed five open shelves to hold five of the same laundry baskets (standard white Ikea style baskets).
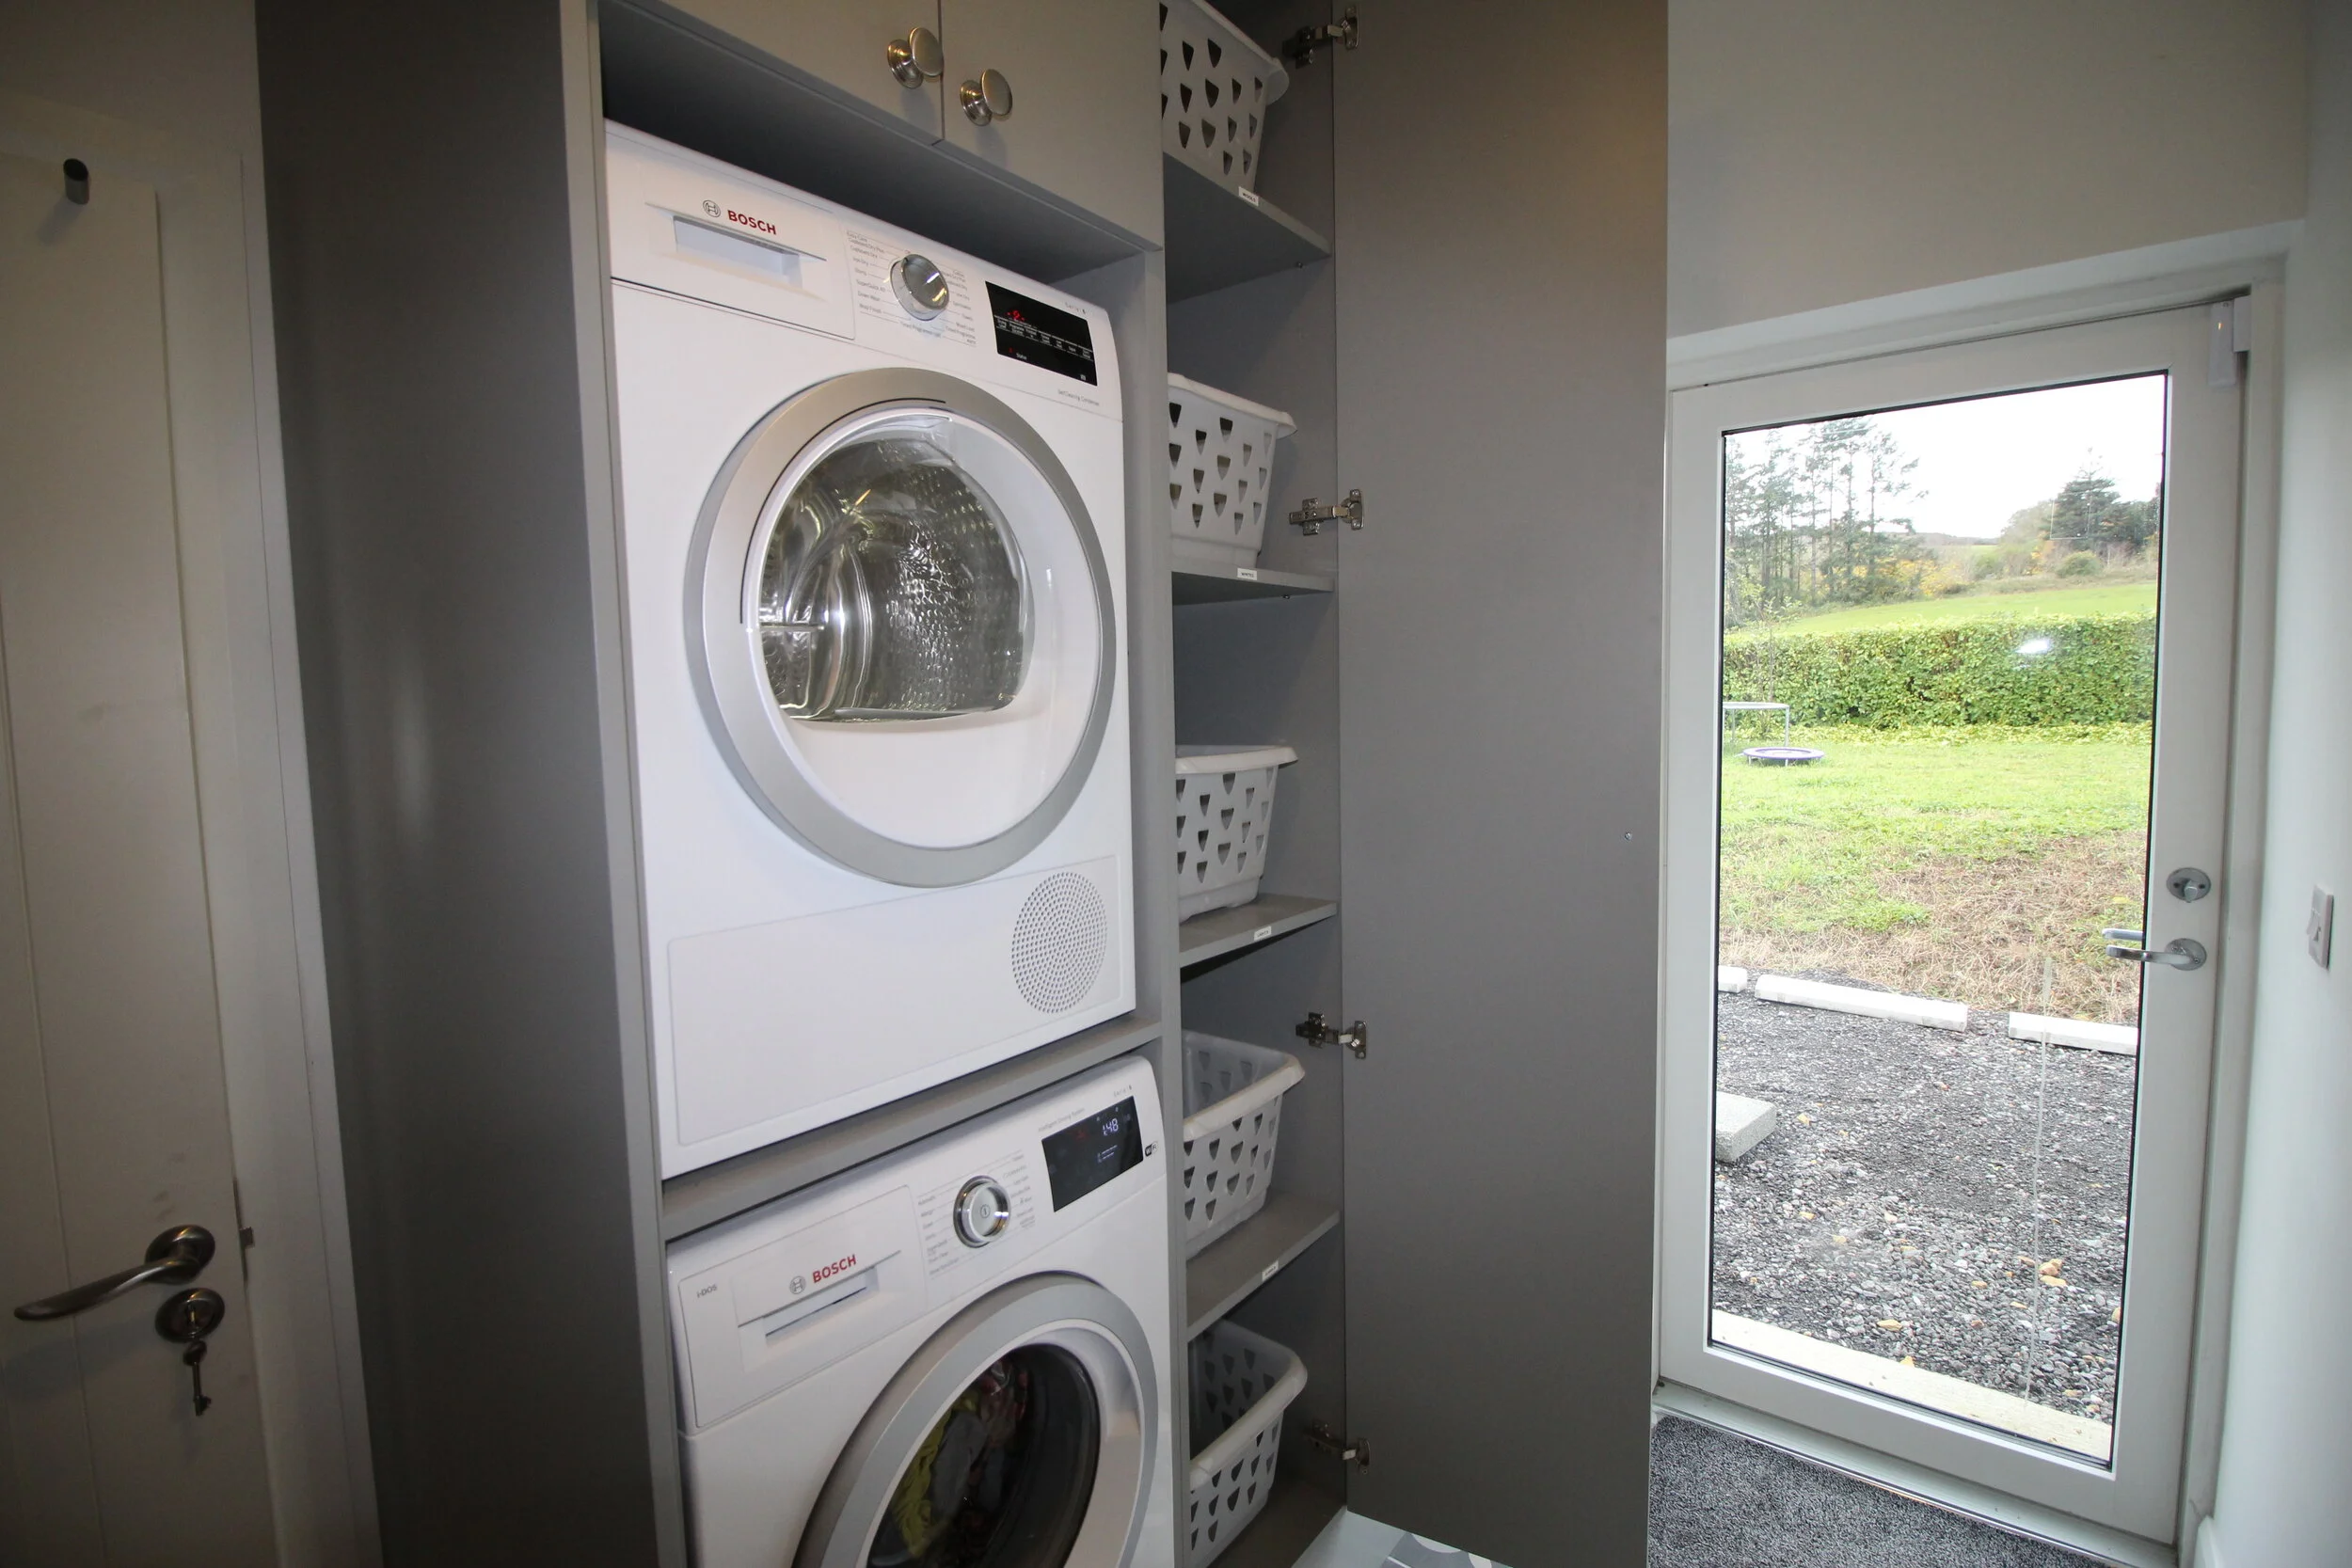
Tumble dryer stacked above washing maching with floor to ceiling shelving for five laundry baskets.
Following on from our laundry unit, we have our tall 100% tall freezer unit (non-integrated), again with double doors above to maximise storage. Here we store our picnic supplies, ice packs along with our camping gas cooker and stock of candles for those dreaded power cuts.
One of my pet hates is the chest freezer! Full to the brim with food, so much so, that the door won’t close shut and when you go to get some food that you KNOW exists – it is nowhere to be found. Be warned, if you don’t keep on top of the content, it will eventually resemble that of a landfill site!
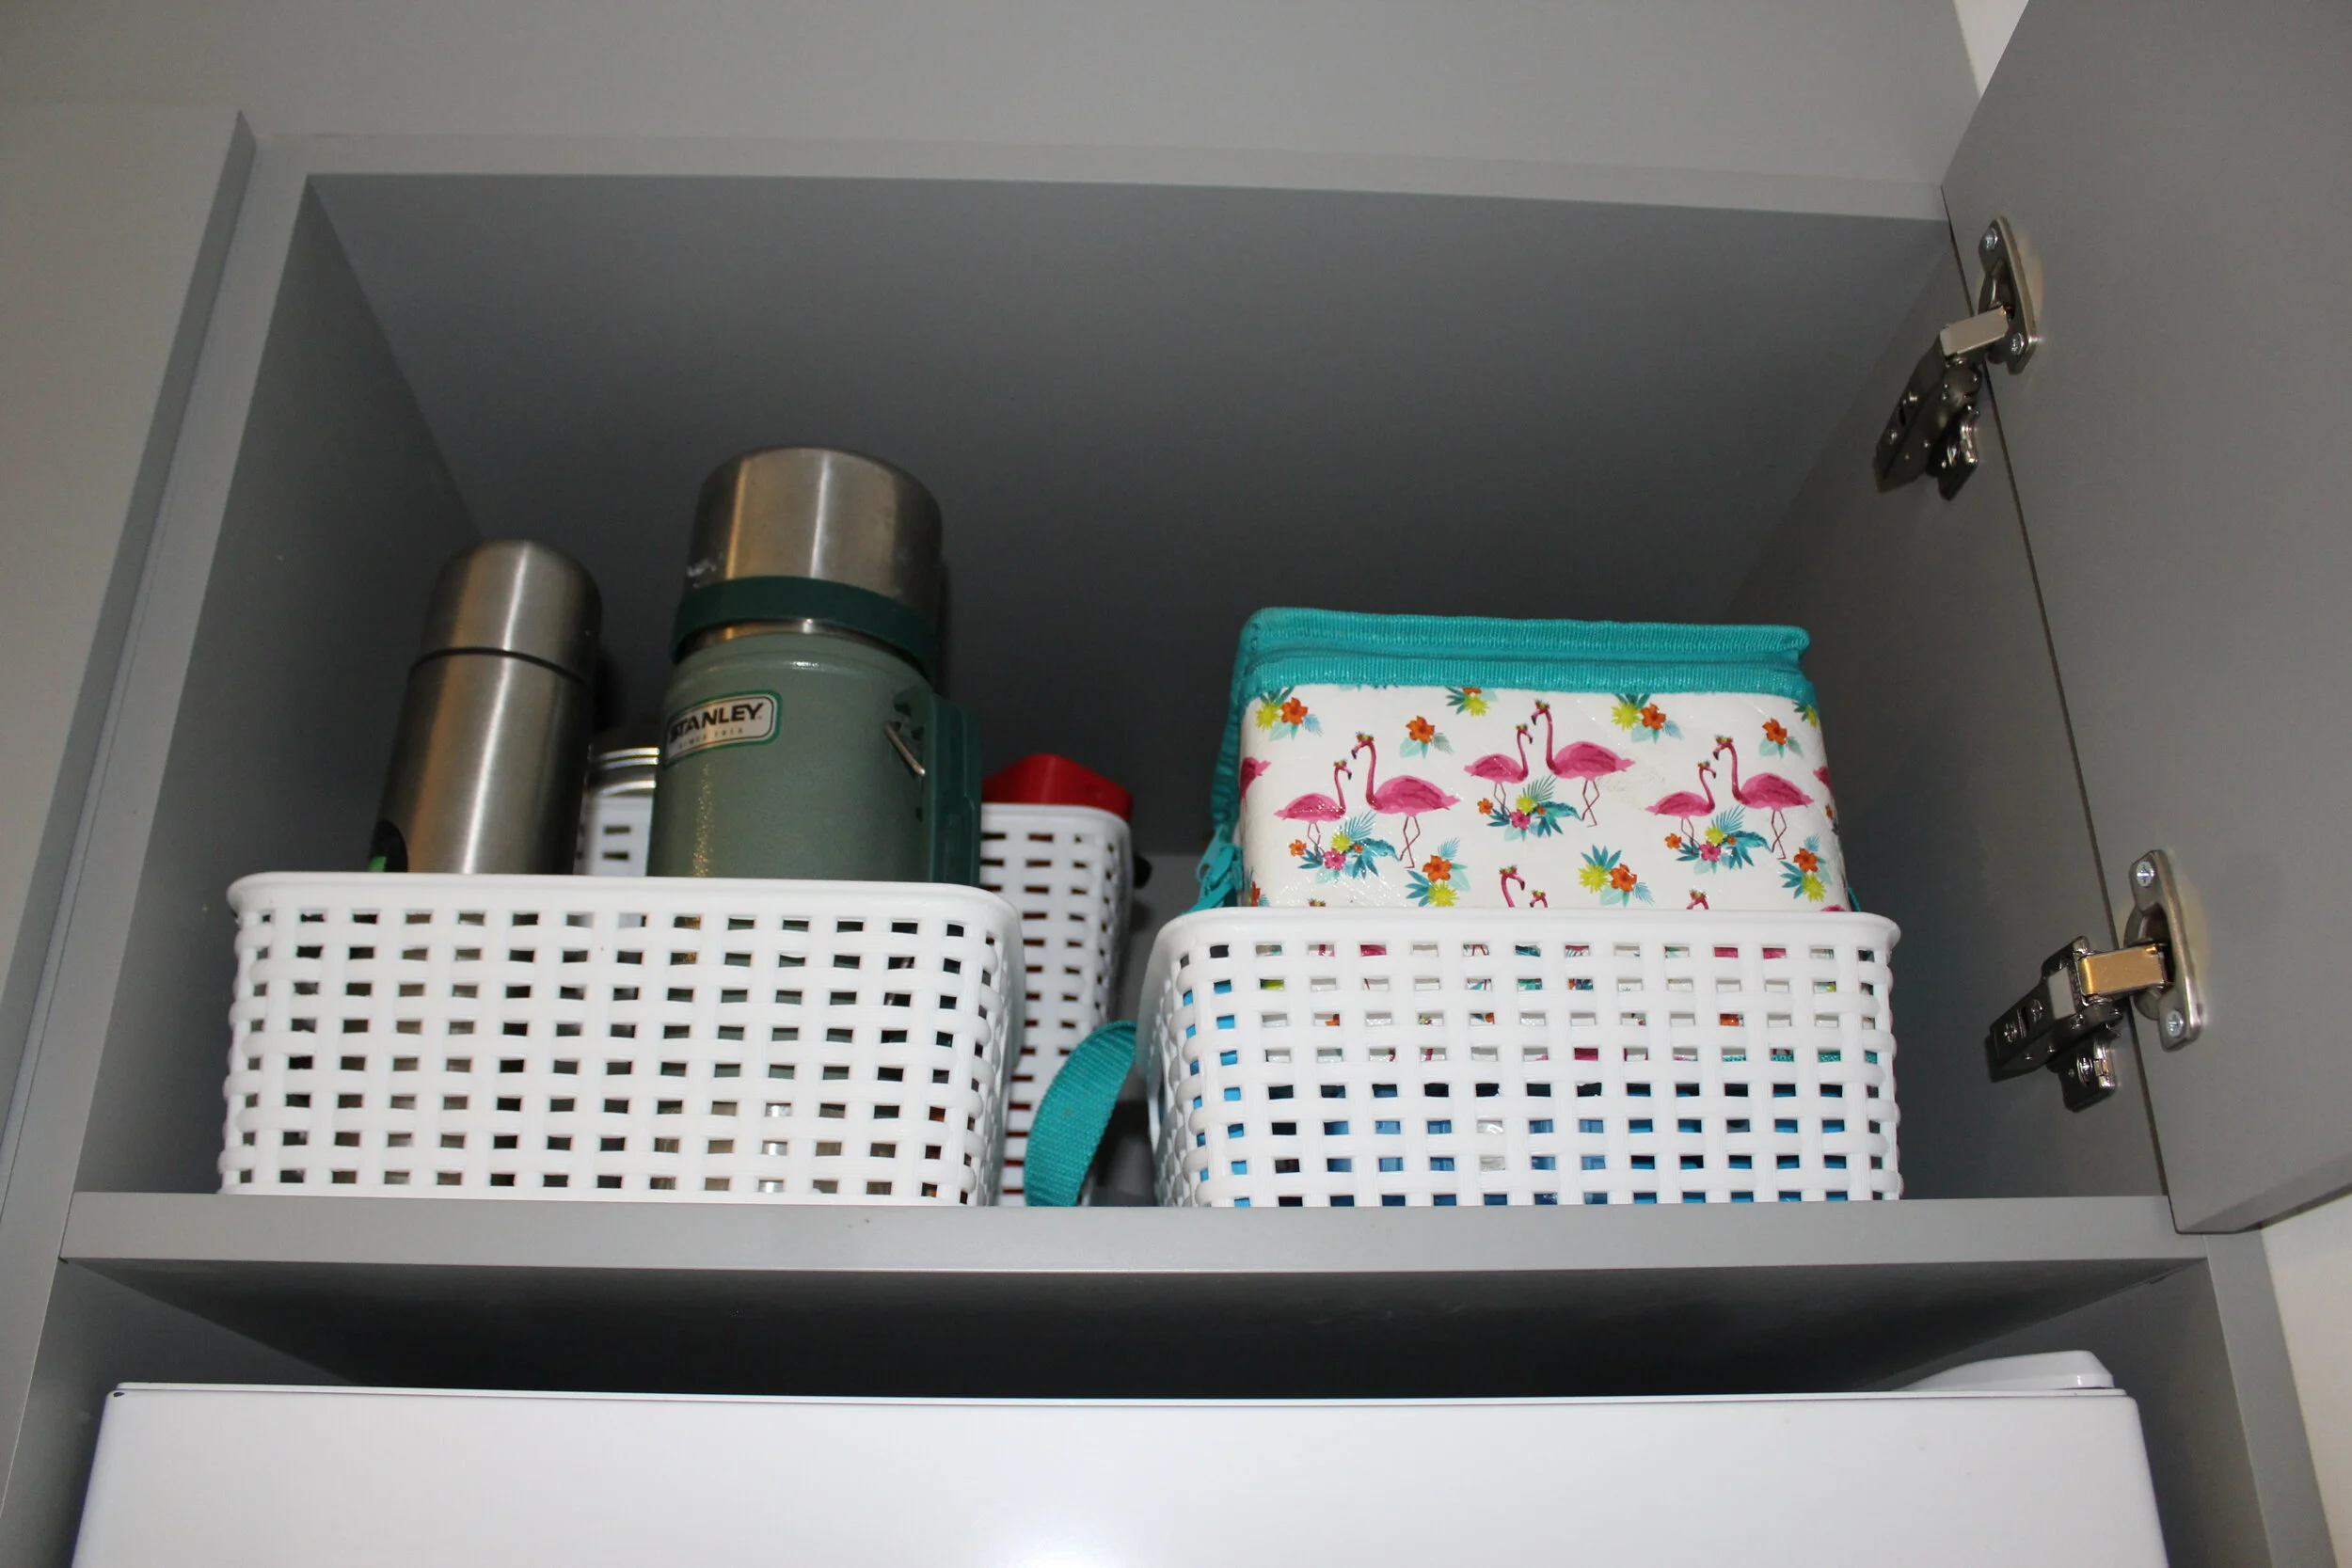
Strong storage baskets with flask and picnic accessories.
When we were designing our actual kitchen, we wanted a 100% fridge and 100% freezer, however, the freezer was going to impact on our clean lines and worktop space, so we opted to place it in our utility (in saying this we didn’t have another option)!!
We have strong heavy-duty containers (white) to suit each space within our storage which can be easily lifted out for cleaning. Maria Kondo would surely be impressed with this!
Hanging rail, the holy grail!
Everyone probably has a different system but at the end of the day it is what works best for YOU and YOUR family. The one thing I was adamant to have in my new utility space was a hanging rail. Hanging slightly damp clothes that are just in off the clothesline has previously proved to miraculously cut down on ironing time (which is slim these days if I am honest). Below this hanging rail I wanted a space for a laundry basket to hold smaller items of clothing eagerly awaiting a good ironing.
Clothes hanging rail and ironing basket below.
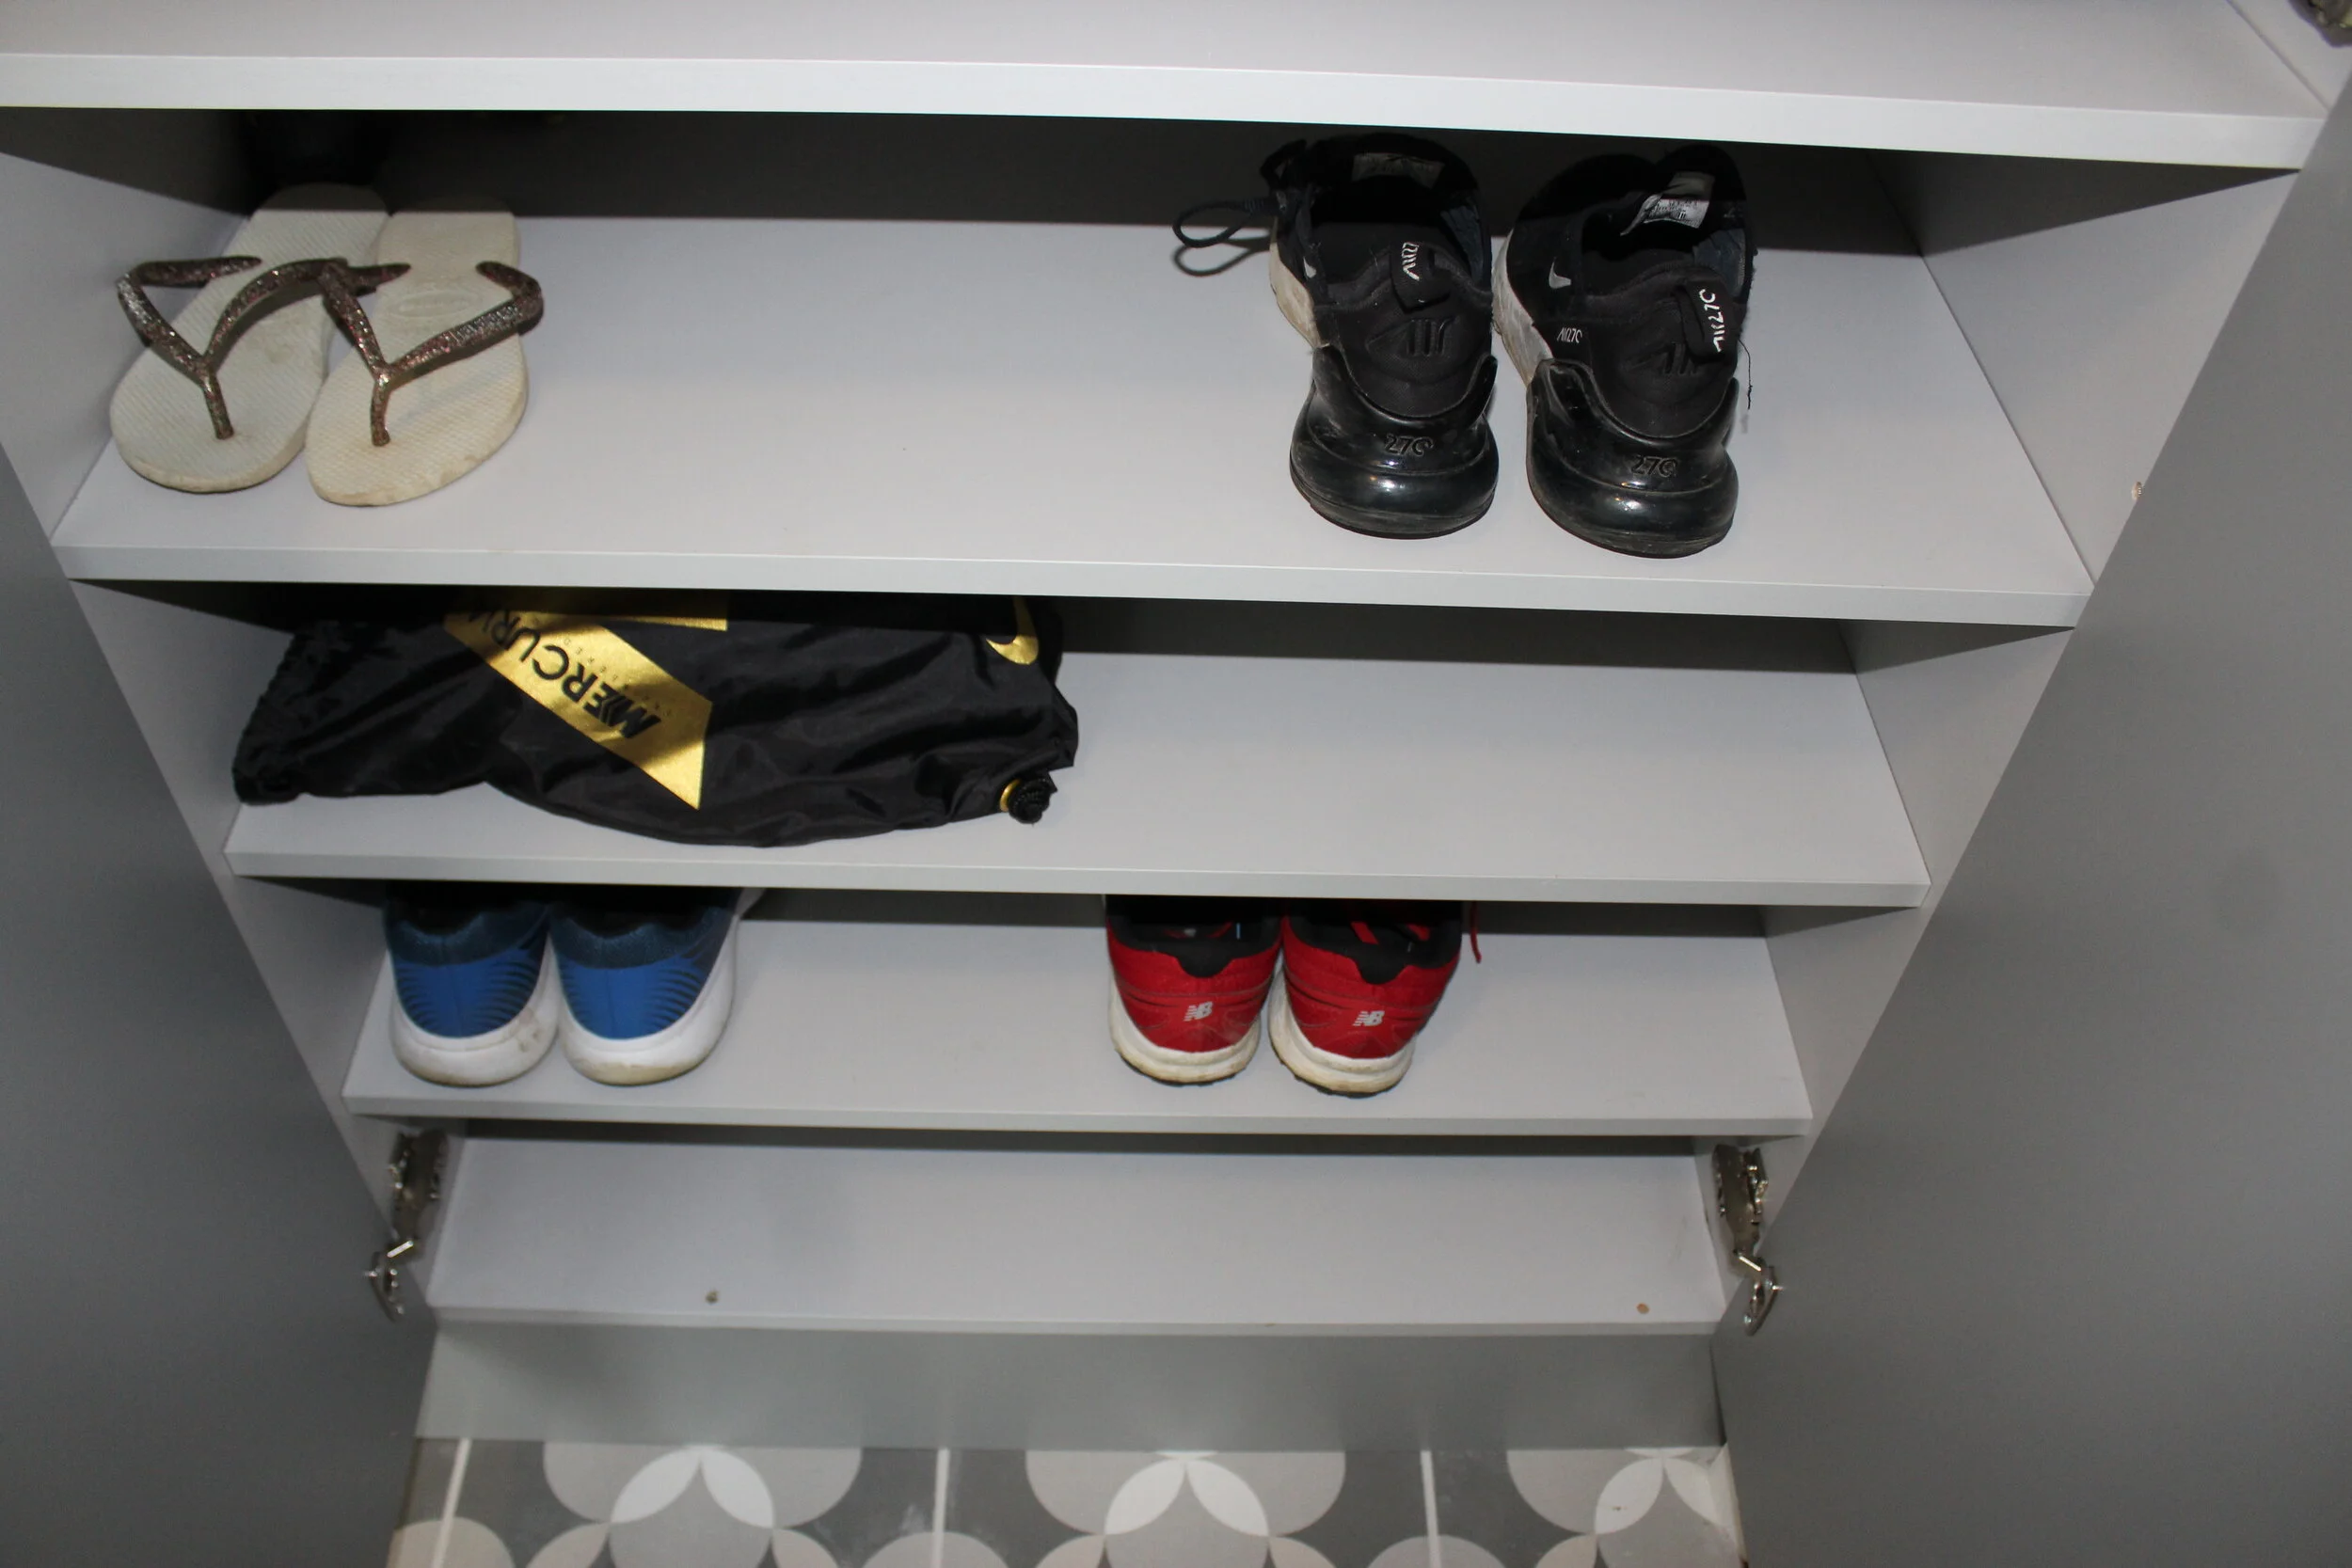
The dreaded shoes, boots and a tsunami of trainers were not going to come between me and our idyllic style utility. So, in the space below the “ironing basket” shelf, we incorporated ample shoe storage, all hidden away of course behind closed doors.
We needed a tall unit for our ironing board and iron and enough space for all the necessary cleaning products, mops, buckets etc. With attention to details our wall of units all look uniform, so eight doors, however, we joined the end two doors to allow ease of taking out our ironing board as we simply only have to open the one door (it’s the little things that make a difference). We placed plenty of hooks within this space to keep everything tidy and orderly.
Behind this space we have a massive steel beam, however, we were able to neatly box this in and make the most of all the available space. With a growing family of pets, their food, treats, leads, coats and plethora of toys, we were going to require somewhere for this lot.

Tall storage unit for ironing board, iron and cleaning items.
When we lived in the house with the massive utility space it just never looked tidy. Why I hear you ask? Well, because there was so much space that items could be placed everywhere. There was no dedicated space for items or order. The large sink and drainer proved to be one extra sink and drainer to clean. I rarely used this, for potting a few plants or the kids cleaning their football boots (it just wasn’t necessary).
Picture Perfect or Practical??
It certainly proved that sometimes we have this ideal vision in our heads of the perfect space but the question to ask is “Is it practical to your needs” Will you use it? Why do you want it! It was a no brainer for me. I had come to realise that the only way to achieve a perfect clean and tidy utility space was to keep it restricted in size and literally have a dedicated place for everything we needed to store.
Whether it’s relaxing or just sorting laundry I prefer to work in a light and uplifting space. So, when it came to selecting our floor tiles, I opted for some playful upbeat geometric porcelain tiles (not cheap) but justified this by the fact that we did not require many!!

Porcelaine geometric floor tiles.
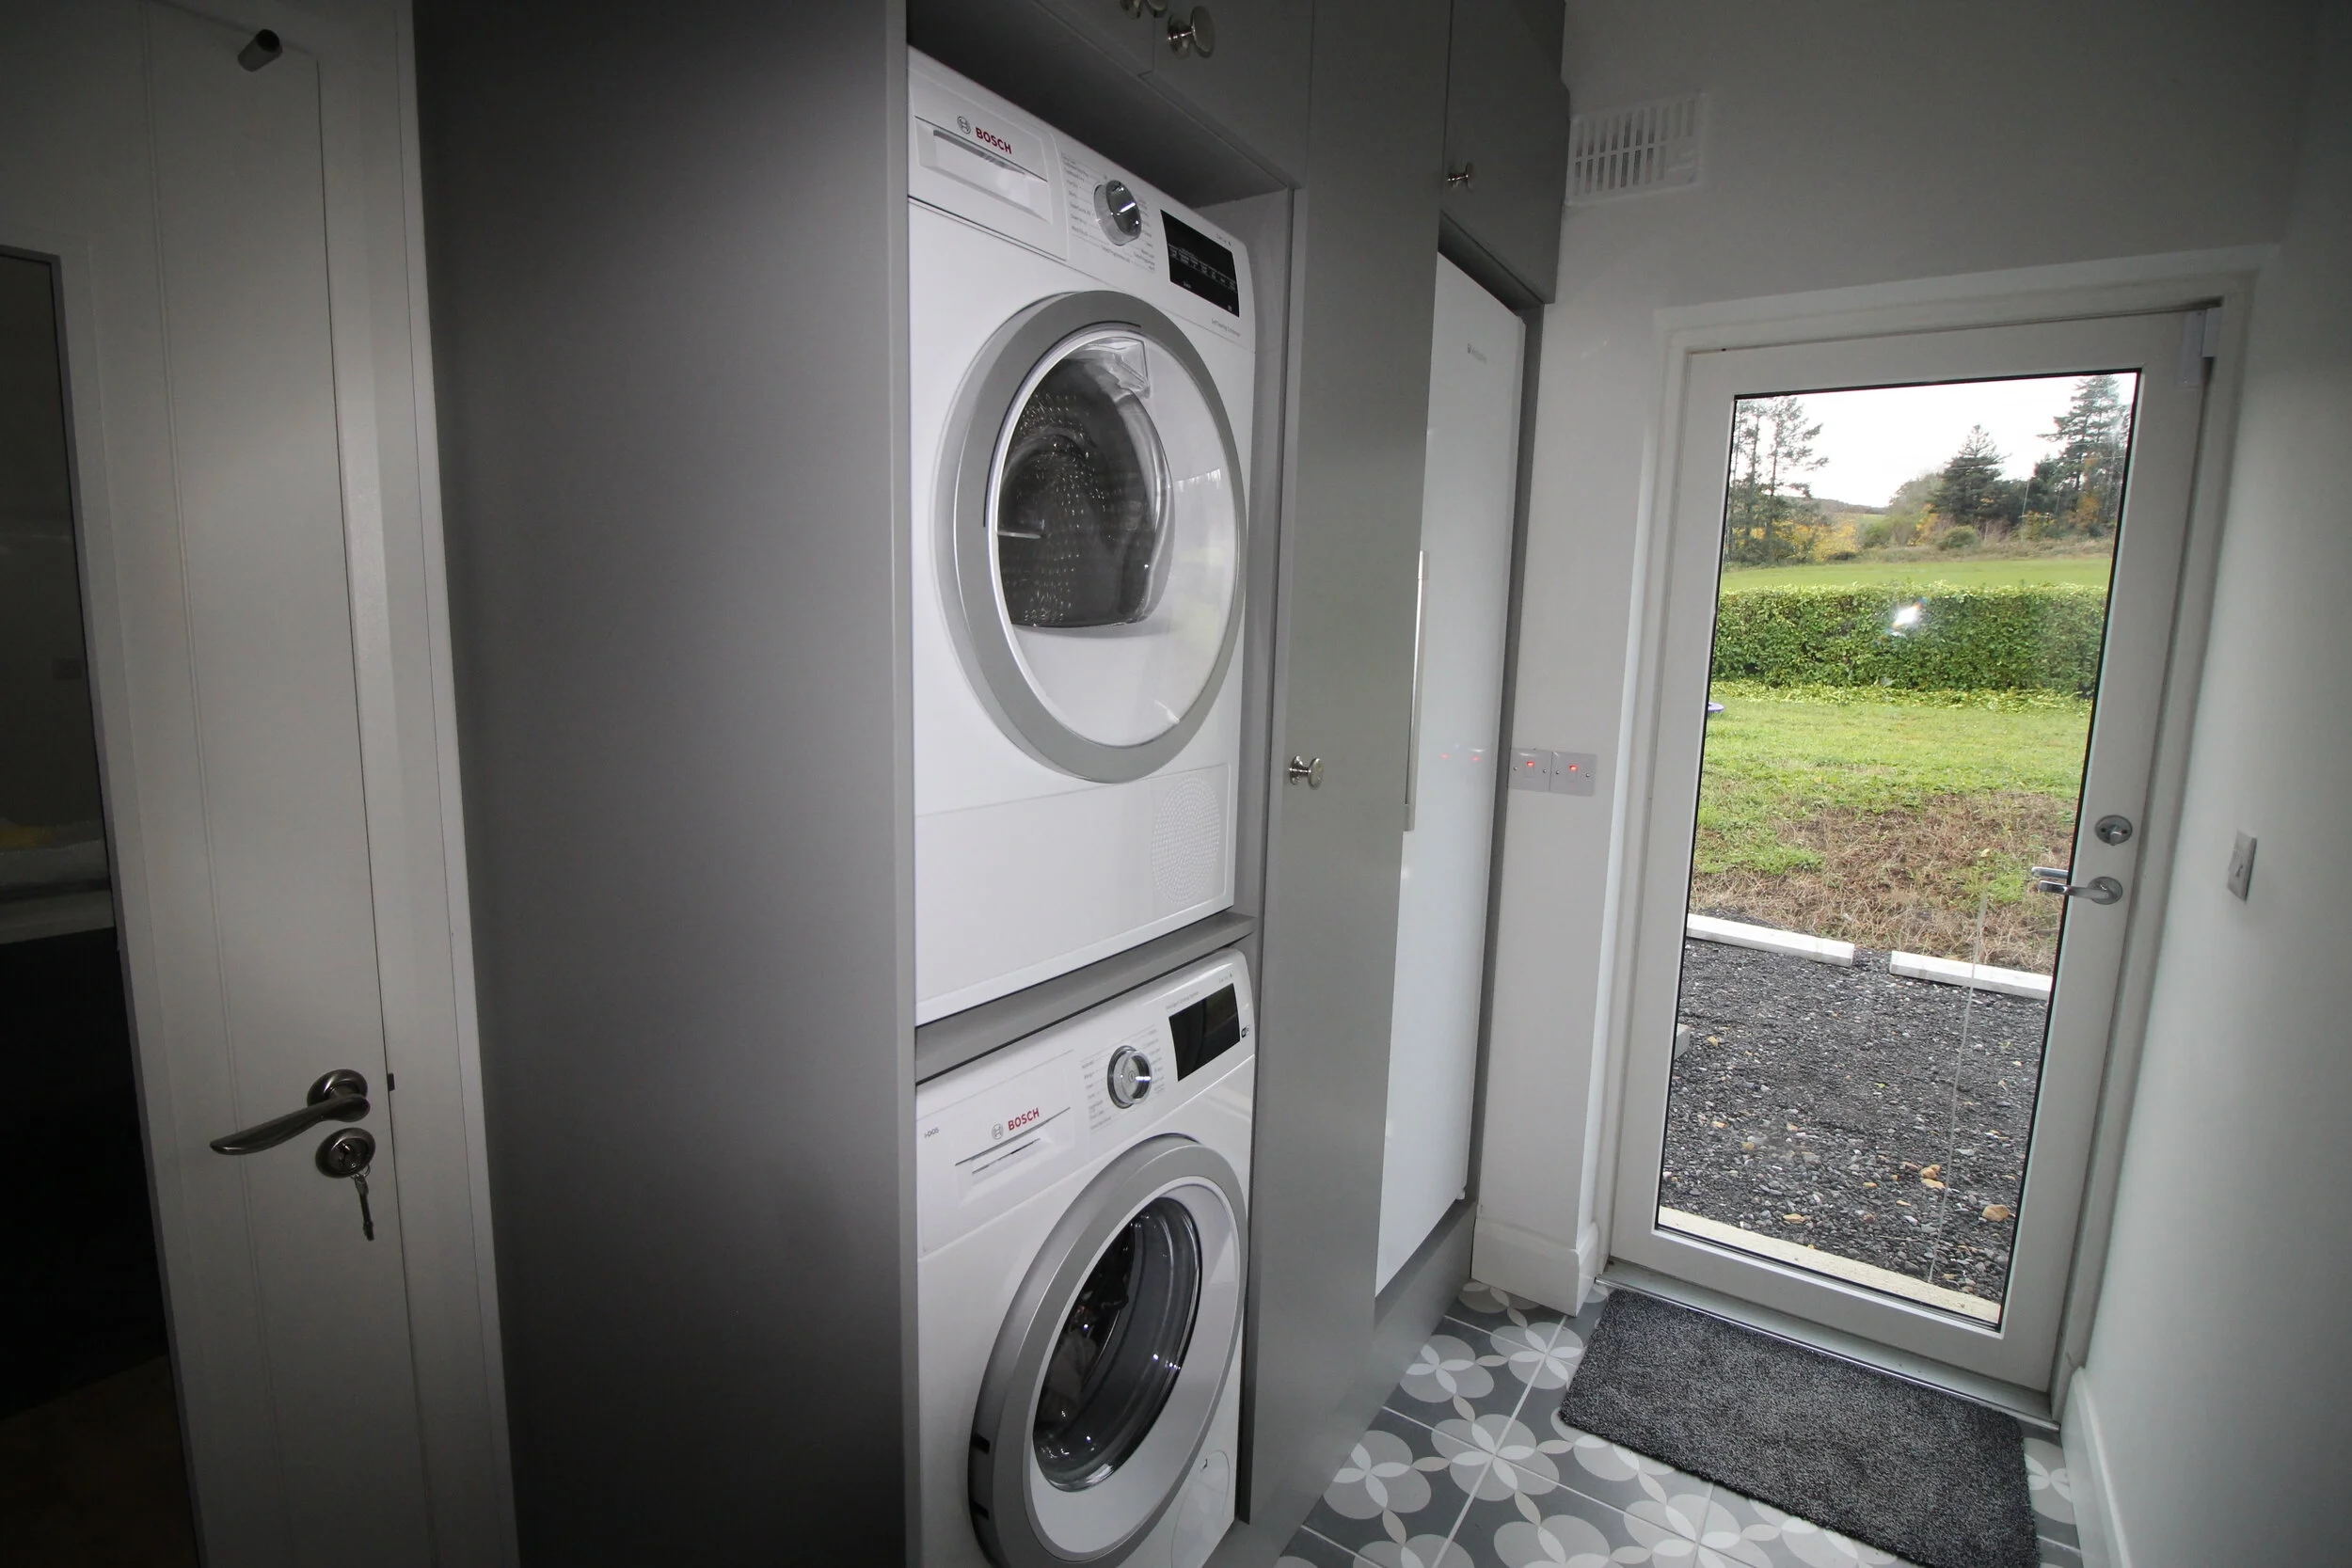
With no window in this space, we purposely placed a full glass rear door to optimise light and this leads out to our side garden, where we have an outside tap and large clothesline. A utility should be well ventilated, so we made sure to include a hit and miss vent and a condensing tumble dryer. We have underfloor heating, which is great, however, we have not resorted to drying our clothes on our lovely floor tiles (not yet anyhow)!
For a clean contemporary look, we opted for simple clean lines with plain doors (no groves to gather dust) and sturdy large satin nickel knobs. For the colour, I took a que from our gorgeous tiles, which are various shades of warm bluey greys and veered on the practical side choosing F&B “Plummett”
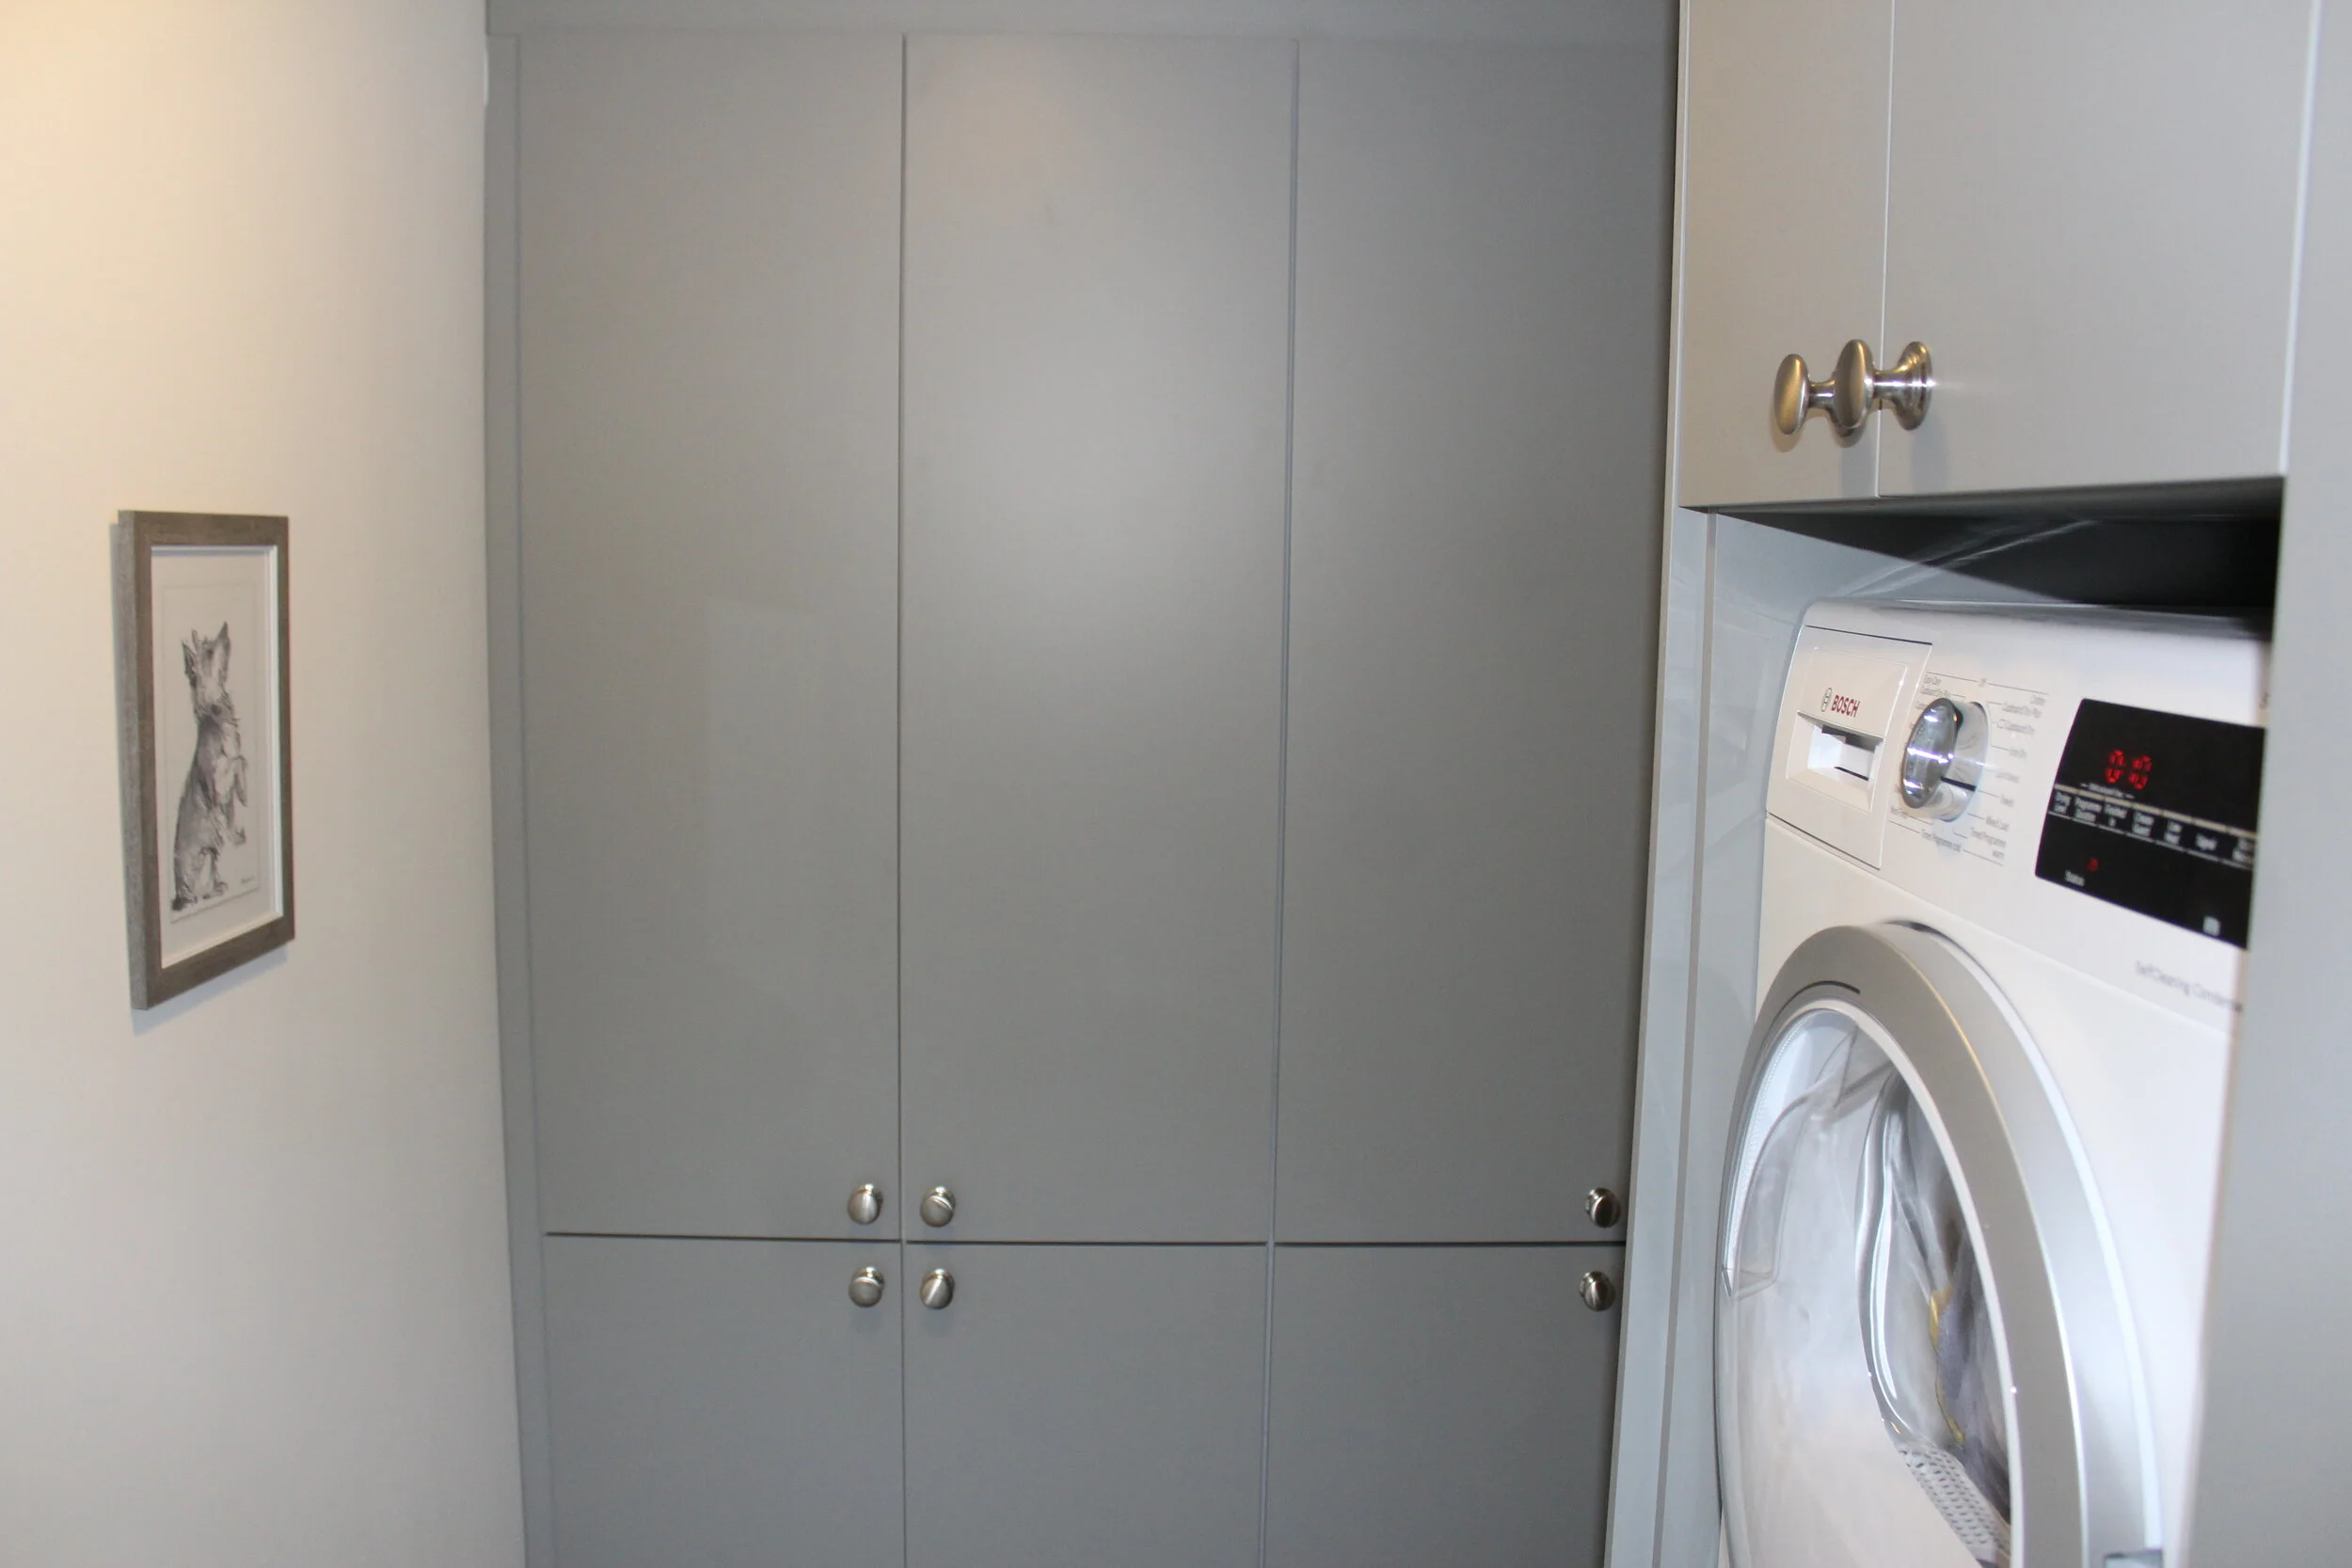
Floor to ceiling utility storage units painted in Farrow & Ball “Plummet”
A small white step ladder from Ikea is perfect for reaching the top units but also acts as the perfect location to plant the laundry basket when filling or emptying the washer or dryer (or to facilitate this little photo shoot, in holding our potted herbs).
We just hung this cute framed sketch and have another similar one on order and we may consider some simply shelving along this wall and then our utility is FINALLY COMPLETE!
Utility Utopia
We are delighted to report it has worked and we LOVE our utility space. Most would winch at the thought of placing a full glass door from their main kitchen area into their utility space but that’s exactly what we did. We have no problem with this space, in fact we want to show it off. It’s bright, clean and tidy and we want to admire those floor tiles from afar!
Our utility, with two banks of floor to ceiling units has just enough space to comfortable walk through to the rear door. This is a walkway, so these floors NEED to be kept clear. So, in other words, it’s not a dumping ground that could form a trip hazard. So, everything has a home in our utility and if it’s put where it’s meant to go - we will have a neat and tidy hard-working utility space.
Utility room with floor to ceiling units.
You can easily open up our ironing board in this space, but my thinking was if I have to do some dreaded ironing, much and all as I love our new utility I would much rather plonk it in front of our TV with my favourite Netflix episode as welcome distraction.
So enough about OUR utility space, what about YOUR utility???
The reason for this blog is to HELP YOU create the utility space of your dreams. In the last year alone, we have worked on one renovation after the other and the utility space usually crops up high up on our customers agenda. We know that you can achieve a highly functional utility in your main kitchen space, hall, garage (converted) and even in your shed – because we have worked on these projects.
You basically need to follow the process I took and apply it to your own situation. Once you have thought about this aspect, you can plan, measure (measure again) and hopefully set about creating your dream utility space, that you will be HAPPY to spend time in. Some spaces may prove difficult to work with but if they are not a runner perhaps re-imagining your existing layout can help you work it out. This may involve altering your kitchen space or moving a boiler location or perhaps a garage conversion or small extension.
Best use of your living space is only achieved by carefully examining how you live and then introducing some creativity in terms of your space. Simply stacking your appliances into a recess off your kitchen with some storage space alongside could be life changing in terms of your laundry. Reversing door openings, installing pocket/sliding doors, reducing one space to increase another are all aspects worth considering on your ideal utility mission.
If a utility is on your wish list and you need some help to incorporate this in the overall scheme of your home re-model, why not get in touch for a chat 01-2548070